Thursday, 23 May 2013

Mamatography - Week 20

Still can't seem to get back into the swing of things over here at TCM HQ...that holiday was obviously far too long & enjoyable!  Still, only one photo missing from this week's post :)

Day 132 - Sunday 12 May
Grandad & Nanny took "their old car with no roof" to a rally meet and we joined them for a picnic.  The weather was too cold for DS to ride home in the car but he has already put in a request for a ride on his birthday!


Day 133 - Monday 13 May
My sister bought me a cute spoon silicone mold and despite my intentions to try it out with a hot chocolate, I ended up making these white chocolate spoons and playing a trick on the kids when I gave them a yoghurt.  I didn't say anything, just waited for them to notice - and once they did, DS couldn't stop himself biting them!


Day 134 - Tuesday 14 May
I made a child-friendly paella which the kids devoured!  Recipe coming soon.


Day 135 - Wednesday 15 May
A friend dropped round this beautiful sunny flower to cheer me up when I was feeling a bit blue - it has lasted nearly 3 weeks and still sits on my kitchen windowsill making me smile :)


Day 136 - Thursday 16 May
Photo failure...

Day 137 - Friday 17 May
A preemptive strike on Father's Day...DD made this lovely "shirt & tie" card which we've hidden away for daddy.


Day 138 - Saturday 18 May
I had a trip down memory lane teaching the children to play hopscotch.  They absolutely loved it, and rushed to the window each morning in the following days to see if their hopscotch grid was still there or had been washed away by the rain!


This post is part of the Mamatography 2013 Project hosted by Momma Jorje and Diary Of A First Child.  We are taking (at least) a photo a day to keep a record of our year.  Join us at any point during the year and start sharing your own daily photos!


***
Without further ado, here are the Mama/Papatography2013 participants!

Wednesday, 15 May 2013

Mamatography - Weeks 17, 18 & 19

I have failed miserably in my Mamatography challenge over the past 3 weeks so this is a bit of a catch-up post...not every day is captured but here are some of the best bits!

Day 111 - 21 April
Making the most of the infrequent sunshine, we spent most of the day in the garden.  DS is learning about mini beasts in school so I took the opportunity to show him a few critters.  Well, I say "I" but what I really mean is I spotted them and then instructed daddy to do the honours.  Here is DS meeting a millipede. 


Day 112 - 22 April
Again spent in the garden, but this time we planted our herbs and veg!


Day 113 - 23 April
Impromptu tea party in the garden after school / nursery.


Day 114 - 24 April
A fantastic end to the evening...get home from a trip to the cinema to find the babysitter has done all my ironing!


Day 117 - 27 April
A walk in the woods on a Sunday afternoon.


Day 118 - 28 April
My dad loves playing tricks on people...I should be used to it by now!  When we went over to help unpack after his recent house move, he had hidden some fake body parts around the place for the kids to discover - much to their amazement *AND* enjoyment...  You know the kind of thing...a hand down the sofa, a leg in a cupboard...this is normal, right?!


Day 120 - 30 April
The best hot chocolate you will ever taste.  Fact.  


Day 123 - 3 May
The beech tree in our garden is now in full bloom.


Day 124 - 4 May
Such a gorgeous sunset over our house...


Day 125 - 5 May
The best part about making cakes - licking out the bowl!


Day 126 - 6 May
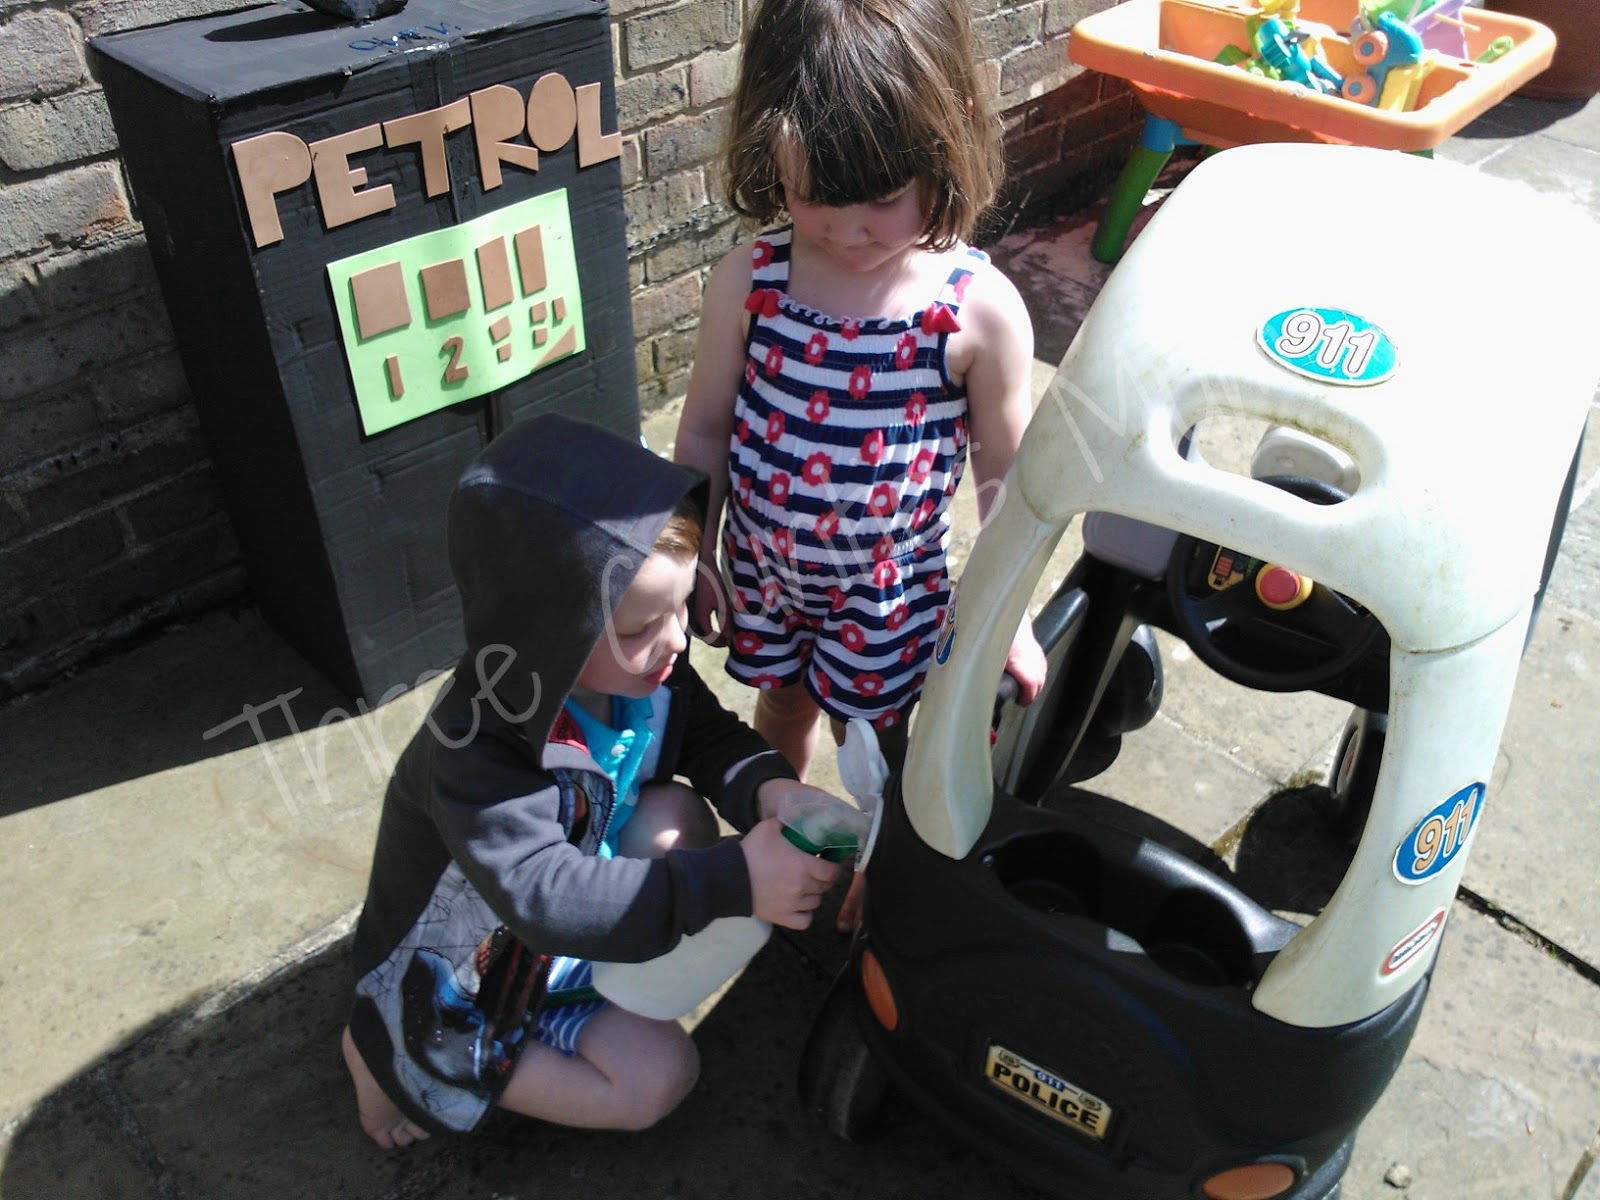
Enjoying the petrol pump I made for them.


This post is part of the Mamatography 2013 Project hosted by Momma Jorje and Diary Of A First Child.  We are taking (at least) a photo a day to keep a record of our year.  Join us at any point during the year and start sharing your own daily photos!

***
Without further ado, here are the Mama/Papatography2013 participants!

Monday, 13 May 2013

Quick & Easy Banana Ice-Cream

This is clearly not ice-cream as we know it but the kids were fooled and polished off a bowl without hesitation.  Nice to have another alternative to banana cake when I've got over-ripe bananas in abundance!


Ingredients
6 ripe bananas, peeled & sliced
1-2 tbsp fromage frais
1-2 tbsp fresh orange juice
1 tsp vanilla extract
A few drops of lime juice to taste

Method
Lay the banana slices out on a tray and freeze for around an hour (or until frozen).


Remove from the freezer and put the pieces in a food processor or blender along with the fromage frais, orange juice and vanilla extract.  Whizz until smooth, adding more fromage frais and / or orange juice to get your desired consistency.  Add the lime juice to taste and serve in bowls with chocolate sprinkles on top!

Pour the remainder into a tupperware box and freeze - remove from the freezer around 10 mins before you want to use it or it will be too hard to scoop.


Tuesday, 7 May 2013

Lumberjack Cake

I made this on Sunday and whilst it took a long time to cook (especially when you have impatient children watching the oven!), it was worth the wait.  I convinced myself it was healthy too, what with all that fruit in :)  

When I told DS that it was called a Lumberjack cake, he said "a Numberjacks cake?  Wow!"  I had to disappoint him and let him know it wasn't anything to do with our CBeebies friends and then explained what a lumberjack is.  To which he said "oh, does the cake have wood in it then?"  Sigh...


Ingredients
3 small eating apples, peeled and diced
200g dried dates (stones removed), chopped
1 tsp bicarbonate of soda
250ml boiling water
125g butter, softened
1 tsp vanilla essence
220g caster sugar
1 egg
225g plain flour

Topping
60g butter
100g brown sugar
125ml milk
50g desiccated coconut

Method
Put the chopped apple & dates into a bowl and add the bicarb and the water.  Cover the bowl with clingfilm and let soak for 10-15 minutes.

Meanwhile, beat the butter, vanilla essence, sugar and egg in a bowl until light and fluffy.  After the allotted soaking time, add the apple & date mixture into the creamed butter mix and stir in the flour.

Pour the mix into a greased tray-bake pan or similar and bake at 180 (fan) for 50-60 minutes.

When the cake is ready to come out, add the topping ingredients to a small pan and heat slowly.  Remove the cake from the oven and pour / spread the topping evenly on the cake.  Return to the oven for a further 20-30 minutes.

Let the cake stand for 5 minutes (if you can bear it) after removing it from the oven before slicing.

I just ate the final piece tonight (2 days after making it) and it was still deliciously moist so it keeps well in a tupperware container.


Monday, 6 May 2013

Cardboard Box Petrol Pump

So the kids have been whizzing around in the toy car this weekend, and while they were playing this morning hubby & I overheard DD saying she needed petrol.  The toy car does have a little petrol cap and we looked out to see DS pouring the contents of his water cup into the hole!  Shortly after, I recalled seeing a petrol pump made from a  cardboard box on the web somewhere and before I knew it, I was well on my way to recreating one for my little guys to play with.


Luckily we had some large cardboard boxes for recycling sitting in the garage so I found one I thought would be the best shape and taped it together.  I knew were were going to paint it so didn't want to use ordinary sticky tape as the paint wouldn't adhere -instead I used black "electrical" tape, which would blend in with it being painted black.  Then I set the kids to work with the paintbrush.


After the paint had dried, I cut out some letters (from foam sheets) and stuck them on the front, along with a counter & some buttons / dials.  You could be much more elaborate than I was but I had two little people dancing around me waiting for the end product!


I used an old spray cleaning bottle and a piece of hose to make the pump.  I cut a hole in the base of the bottle and slotted the hose into it - it was quite a tight fit so I didn't need to worry about it falling out.  Then I cut another hole in the bottom of the cardboard box to slot the other end of the hose into.  Finally, I cut a large hole in the side of the box to hook the "pump" into.


I had intended to make the sign on top swivel round with one side reading OPEN and the other CLOSED but I found that it wasn't sturdy enough to withstand the turning so I taped it into place with just the OPEN side showing.  This was made from two oval pieces of card stuck together with a straw taped between them...the straw was the weak link, it was too flimsy!  A stick (or even a pencil) would have been better.  I wrote the OPEN sign on with glitter glue.

They loved it and played with it for ages, taking it in turns to be the petrol pump attendant versus the car driver.