Showing posts with label Play. Show all posts

Friday, 15 November 2013

Autumn Playdough

A few weekends ago, Sunday morning saw the rain pouring down and it looked as though we would be housebound all day.  Fine by me but I knew we would need something to keep the littles amused so I made some autumn play dough.  I used the same recipe from before but added some cinnamon and nutmeg to make it smell wonderfully autumnal plus some red and yellow paint for colouring.  (It actually turned out a little more pinky than I planned but they didn't seem to notice!)

Motorbike Man man a dash into the garden between showers and collected a variety of leaves, herbs and nuts from the garden, and we were set.  We created trees of varying detail, from a few simple pasta pieces to a full display of leaves and nuts in the play dough.


We thought of autumn related things and made some of those - conkers, fireworks, pumpkins using the dough and some accessories.  

They learnt to identify the tree by its leaves - I was impressed that Spiderboy could name quite a few of them!


We passed a good hour or so having fun with all the autumn colours and the kitchen had a lovely smell afterwards!


Friday, 31 May 2013

Bath Paints

We were faced with another wet day on Tuesday, the first official day of our half term holiday, so I got around to making up some bath paint for the kids to enjoy.  I've been meaning to do this for a while and as we skipped bath time on Monday due to a late pub supper, I had the perfect excuse!  

I've seen many "recipes" on the web for this so I made one I vaguely recalled using clear bubble bath and cornflour, along with some food colouring.  I kept the food colouring to a minimum, just in case it stained anything but it was fine - in fact, the colours were a little muted so I would probably used some more next time.


I used 1 cup of bubble bath (or body wash) - just make sure it is clear or the colour won't work as well.  Add around 2-3 tbsp cornflour, or enough to thicken it up to your desired consistency.  Separate the mixture at this point, and add a few drops of food colouring to the different pots.

Add two paintbrushes and some eager children then let loose on the bath tiles!  


They loved it, drawing pictures and writing letters on the walls.  Plus they had just as much fun washing it off the walls with the shower afterwards!


Thursday, 23 May 2013

12 Minutes Reconnection

DS does love the occasional Ribena so I was disappointed that our recent holiday co-incided with an event they were holding to create a new Twelve Minute Manual on play for their website.  

This article explains that a recent study about working guilt has found that parents feel they need at least 30 minutes to reconnect with their child after a day's work, but in reality they can do that in just 12 minutes.  When I first read that, that didn't sound a lot but you can actually have a really fun game in that short time!

The manual contains 30 ideas of simple play to help you reconnect with your child after a day at work and although I missed out on contributing, I got sent a copy on our return from holiday.  

It has some simple but effective suggestions in it.  Although I don't work outside the home, after a day rushing around doing chores while they are at school & nursery, I often need to re-adjust after picking them up and change my pace to reconnect with them.  

I tried out a few of the ideas from the manual, such as drawing hopscotch with chalk - such a simple thing but one both my kids loved!


And although I haven't tried it yet (not feeling brave enough perhaps?!), I am definitely going to let DD lose in my make-up bag and see what she makes me look like!  I like the idea of blindfolding each other and tasting three different foods to see who can guess most accurately too.

I was also interested to read about phrasing your questions to get more information from your child.  I often get met with a nil response to my query of "what did you do at school today?" so lately I've tried changing tack and am finding that "what was your favourite thing you did today?" and "tell me about a game you played today" has meant I get to learn much more about DS's day.

The manual had a few other ideas that we enjoy regularly, like building a fort with sheets & blankets and having a picnic for dinner (indoors or outside!)  Simple ideas are often the best - we can easily get wrapped up in toys and gadgets when we really don't need them.

Plus when you're done with all the play, you can cool down with a tasty glass of Ribena :) 


Monday, 6 May 2013

Cardboard Box Petrol Pump

So the kids have been whizzing around in the toy car this weekend, and while they were playing this morning hubby & I overheard DD saying she needed petrol.  The toy car does have a little petrol cap and we looked out to see DS pouring the contents of his water cup into the hole!  Shortly after, I recalled seeing a petrol pump made from a  cardboard box on the web somewhere and before I knew it, I was well on my way to recreating one for my little guys to play with.


Luckily we had some large cardboard boxes for recycling sitting in the garage so I found one I thought would be the best shape and taped it together.  I knew were were going to paint it so didn't want to use ordinary sticky tape as the paint wouldn't adhere -instead I used black "electrical" tape, which would blend in with it being painted black.  Then I set the kids to work with the paintbrush.


After the paint had dried, I cut out some letters (from foam sheets) and stuck them on the front, along with a counter & some buttons / dials.  You could be much more elaborate than I was but I had two little people dancing around me waiting for the end product!


I used an old spray cleaning bottle and a piece of hose to make the pump.  I cut a hole in the base of the bottle and slotted the hose into it - it was quite a tight fit so I didn't need to worry about it falling out.  Then I cut another hole in the bottom of the cardboard box to slot the other end of the hose into.  Finally, I cut a large hole in the side of the box to hook the "pump" into.


I had intended to make the sign on top swivel round with one side reading OPEN and the other CLOSED but I found that it wasn't sturdy enough to withstand the turning so I taped it into place with just the OPEN side showing.  This was made from two oval pieces of card stuck together with a straw taped between them...the straw was the weak link, it was too flimsy!  A stick (or even a pencil) would have been better.  I wrote the OPEN sign on with glitter glue.

They loved it and played with it for ages, taking it in turns to be the petrol pump attendant versus the car driver.


Sunday, 3 March 2013

Frozen Letter Blocks

I've seen this a few times on Blogs and saw it again recently on Bath Activities for Kids, and was reminded what a great idea it was.  My two loved this when I bought it in for them in the bath, and begged me to make more right away for the next night!

Our bath letters are too big to use for this so I used our magnetic fridge magnet ones.  Find a small (plastic) toy and spell it out using the letters.  Put it all into a tuppaware, fill with water and stick it in the freezer overnight.  


The next night, I took the ice blocks out of the tuppaware and gave one to each of them.  They loved the feel of the cold ice, and enjoyed melting them in the warm water bit by bit...one letter would come off then they would swish the block round in the water to release the next letter.


As my letters were magnetic, I bought up two flan tins to stick the letters onto.  

Once all the letters and the toy were released from the ice block, I helped DD spell her word out while DS managed his on his own.  


The finished product...words proudly spelled out with accompanying toy!


Friday, 1 March 2013

Paperclip Treasure Hunt

DS bought home his library book from school recently, and it was Sonny's Treasure Hunt - a cute little tale about a duck that gets bored and his grandma sets up a treasure hunt for him.  We enjoyed reading it, and when daddy was trying to get 10 minutes peace to watch the rugby a few days later, I thought I would set up a hunt for my two monkeys.

I googled images of pieces of furniture around our house (or things in the garden if you're doing it outside) - see my lists below for the kind of things.  I chose things I was pretty sure I could find an image of on the web, then printed these out.  

House: 1) rocking chair, 2) beanbag, 3) toy kettle, 4) cat basket, 5) dining table chair, etc.
Garden: 1) wheelbarrow, 2) dustbin, 3) playhouse, 4) bench, 5) seesaw, etc.

Keep the first item aside then hide the next.  Using the numbers above as an example, it's like this - hide number 2 (the beanbag picture) in the number 1 space (the rocking chair); hide number 3 (the toy kettle) in the number 2 space (the beanbag), and so on.  You can make it as short or as long as you like, and I made sure that the next one was as far away from the last as possible in terms of distance i.e. number 1 was upstairs, number 2 was downstairs, number 3 was upstairs...this ensure it wears them out a little running back & forth :)  If you're doing it in the garden, space them out at opposite ends of the garden.

I folded up each printed picture and "secured" it with a paperclip of a different colour.  This gave DD a role - she collected the paperclips that DS gave her, and ticked them off a list I made for her on a little clipboard - check boxes she could tick alongside a coloured paperclip image.  They worked really well together doing this, and it was lovely to see.  

I used two gold chocolate coins for the treasure at the end, which they were delighted to find!


DS finds a clue under the dustbin!

We've done this a few times since too, and they just love it!  It's a good one to remember for quiet afternoons at home and / or rainy days.

Monday, 11 February 2013

Valentine Love Heart Crayons

This is an easy cute gift for little ones to give to the friends they *love*.  

Gather up all the broken / old crayons...any colours will do although the more red there are, the more like love hearts they will be.  Put the pieces in a food bag and smash with a rolling pin until all the large pieces are broken up, and you are left with crumb-like crayons (this is the fun part!)


Divide the "crumbs" between the hearts in a silicon mould like this one.  Bake at 150 degrees for 15 mins...open the windows when you do this, as the smell is quite strong!


Allow to cool slightly, then turn out of the mould to cool further.


Present in a cellophane bag and tie up with some red ribbon and cute tag for a lovely homemade Valentine :)


Friday, 1 February 2013

Tutu

Since I took DD to her first ballet class a few weeks ago, she has decided she wants to be a ballerina.  That, naturally, requires a tutu.  So I set to work...after DD informed me that she wanted one in "pink, blue AND purple".  Right then.


I found this easy tutorial at The Ribbon Retreat, and after ordering some tulle in the decided colours, I sat down on Wednesday evening and made this in 40 mins...from start to finish!  

You'll need some elastic for the waistband - I measured mine around DD's waist then made it a bit smaller, as I figured she'll be pulling it on and off and it will get stretched over time.  Sew the ends of the elastic together to make a band...then you can put the needle & cotton away!

Next, you need to cut lengths of tulle to tie onto the band - again, I got DD to hold the band on her waist and measured a strip to her knee, looped over the band (i.e. double that length).   I then cut a few lengths at a time, and cut more as I went along.


Its easiest if you have something to hold the elastic in place so I used this little chair.  Loop the tulle over the elastic and tie a knot one way, and then the other way.


I used two pieces of tulle at once, to get the colour effect, varying the colour combinations as I went round - pink & purple, blue & purple, pink & blue then repeated.  Carry on tying on the lengths as you move round the band.


You may need to shift the knots round at the end so don't tie them too tight!


DD was delighted when I showed her the next morning - here she is prancing round the house in it the next day...


...and the following day, wearing it again to go shopping...why wouldn't you wear a tutu to pick up your groceries if you could?!


Wednesday, 23 January 2013

Chinese Lanterns

Do you remember making these as a child?  I do...and while we were passing the time indoors on a snowy Saturday after the kids were tired of snowman building, I showed them how to make these.  


This year, I'm trying to mark each celebration in the calendar...Burns Night, Chinese New Year, Pancake Day, Valentines Day, etc. with a little craft so I began thinking about these a few weeks ago.

They are so easy to make, the kids love it.  All you need is:

Red paper (or any colour will do, but they are traditionally red)
Scissors
Sticky tape

Fold your paper in half length ways, and cut slits all the way along the fold (staying around an inch away from the top).


Open the paper out and tape each end together to make the lantern.  


You could add a little paper strip for a handle to hang these (as I seem to recall doing as a kid) or put a LED tea light inside, like we did - the lanterns are now sitting on their beside tables and I was finally able to throw away the gingerbread houses from Christmas!

If you want to get even further into Chinese New Year, Red Ted Art has a great round-up of crafts, and Twinkl has some printables that I will be using to decorate the house when we cook our Chinese dinner on 10 February!


Friday, 18 January 2013

Rainbow Salt Tray

I saw this idea and thought it was a fun idea to get little ones to discover shapes, colours, numbers or anything else hidden underneath the salt.  

It was easy to put together - you just need:

A baking tray (I used the deepest one I had to avoid too much being flung over the sides!)
Packet of salt
Coloured paper sheets
Sticky tape or glue
White shapes (or numbers)
Paintbrush

Overlay the coloured sheets until you have a section of each showing to make the "rainbow"  effect and stick together, making sure it will fit within your tray.  


Stick your shapes or numbers on top.


Pour the salt on top generously and let them loose with a dry paintbrush!


DD loved discovering all the shapes hidden underneath, and kept her busy while I made dinner that evening - result!

Monday, 14 January 2013

Puzzle Organisation

DD is crazy mad on puzzles right now - she will sit and do a 35 piece one by herself which at 29 months is pretty impressive, even if I do say so myself ;)  What is not impressive though is the amount of space the puzzle boxes are taking up in the play area.  So last week I came up with a plan, & here it is.

I had 4 different Peppa Pig puzzles, each in a separate box which had been stood on / broken in some way.


Tired and sorry box after somebody's foot landed on it!
Take one biscuit tin which is inexplicably empty...*whistles nonchalantly*


I put each puzzle into a resealable food bag and placed it in the tin.


Cut the picture from one puzzle (I chose the one with the most pieces as that is one she is most likely to need to refer to) and glue / tape it onto the lid of the biscuit tin.


I then cut small pictures out of the other puzzles (the side of puzzle boxes usually has a tiny picture on it) and taped them to the side of the biscuit tin, including a repeat of the large picture so there was one of each of them.


I freed up space from 4 whole puzzle boxes by putting them all into one tin.  The best part was that the bags are easy to transport so we took one to Grandad's house yesterday to keep ourselves busy over lunch :o)


Saturday, 12 January 2013

Doll's Skirt

As soon as I saw the gorgeous skirt that Ashley over at Make It Love It made for her daughter's room, I knew I wanted to give it a go - this is my version.  

DD's favourite doll, Big Dolly, is lacking in the wardrobe department so it was a good excuse.


 Ashley's tutorial is wonderfully clear so I won't repeat the instructions here - just head over to her site if you want to see how to do it properly.  I was using up scraps of material so my skirt didn't bunch out as much because the material piece was not very long - just twice the width of the doll's waist (same with the netting underneath).  I also like to do my sewing in the evening so this was made entirely by hand, not machine.  

Front of the skirt

Back with netting
DD was thrilled this morning to find it ready for Big Dolly to wear...and now she has asked for a top to go with it!  Guess that will be tonight's job :/


Saturday, 22 December 2012

Father Christmas Cone

Another of my dodgy craft attempts for you to laugh at!  But these were super easy and fun for the kids to make without too much help.


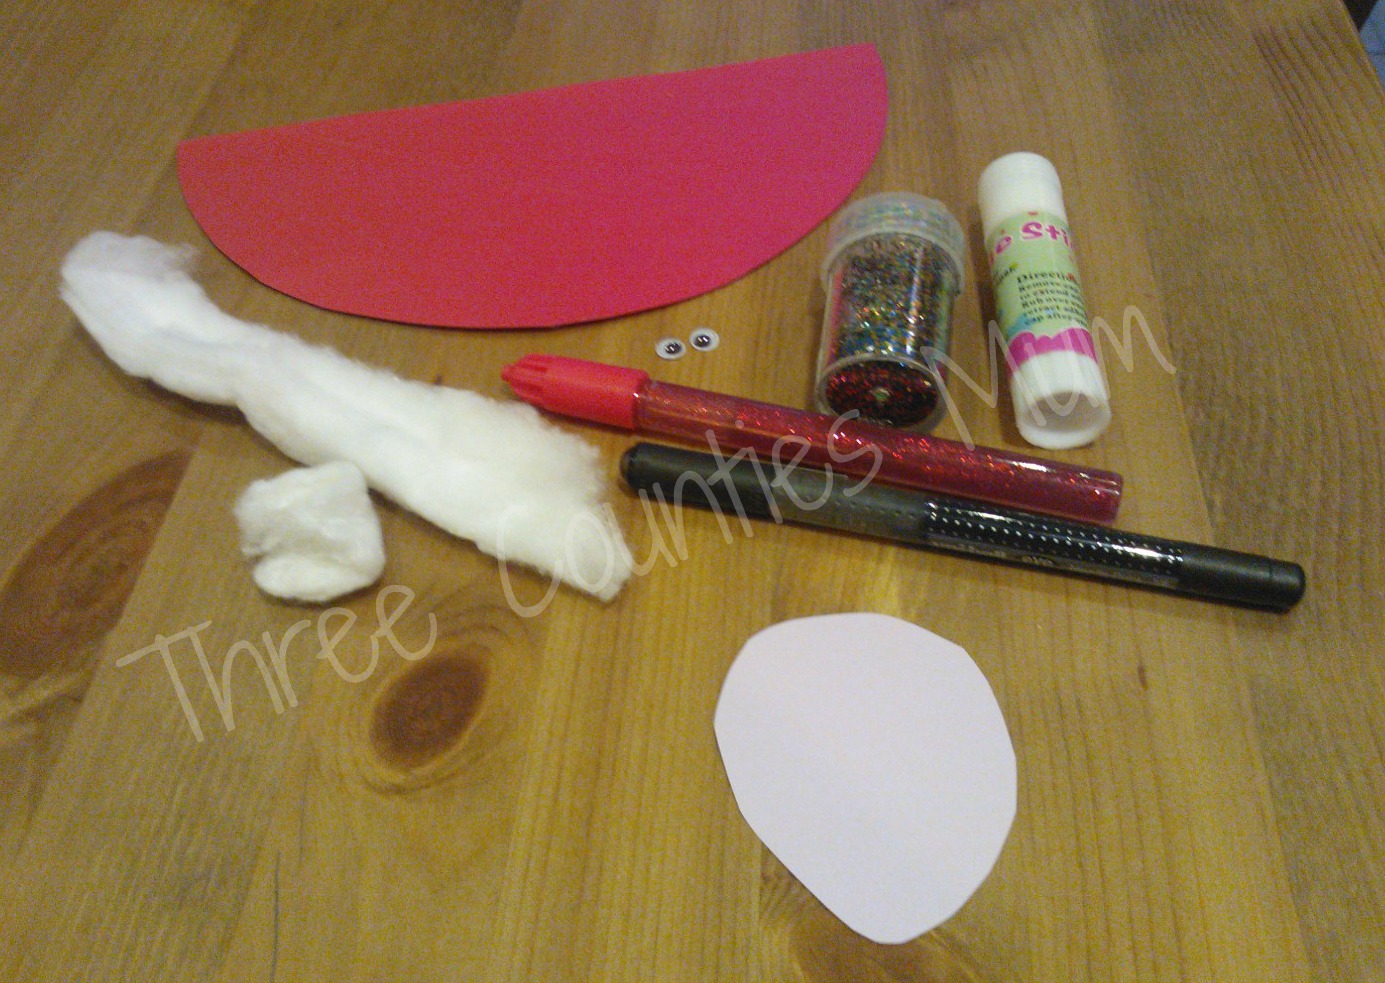
You will need:

Red card
Pink paper
Glue
Glitter
Cotton wool
Googly eyes (optional!)


First, cut a semi circle out of the red card for the cone body and an oval / circle for the face out of the pink card.

Next, draw on the face.  We used googly eyes and red glitter glue for his nose but you could just as easily draw on the features using a pen.


Stick the face on to the middle of the red card.


Next, glue the cotton wool around the bottom of his face for the beard.


Now tape the cone together at the back and add cotton wool to the top of the cone for his hat.


Add glitter around the base of the cone for extra Christmas sparkle!


I think mine looked more like one of the wise men!  

This is the best one by a mile...proudly made by DS, aged 4.